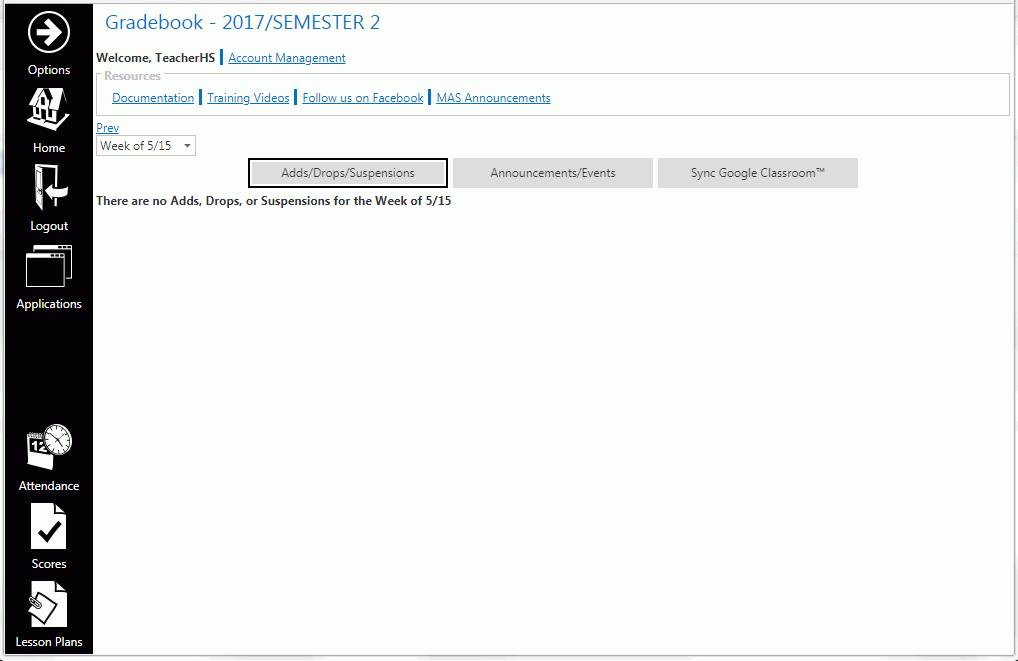
Whenever you log into the Application, the Home Page will appear:

The Home Page contains information that is pertinent to your week with quick links to get you to other areas in the Application.
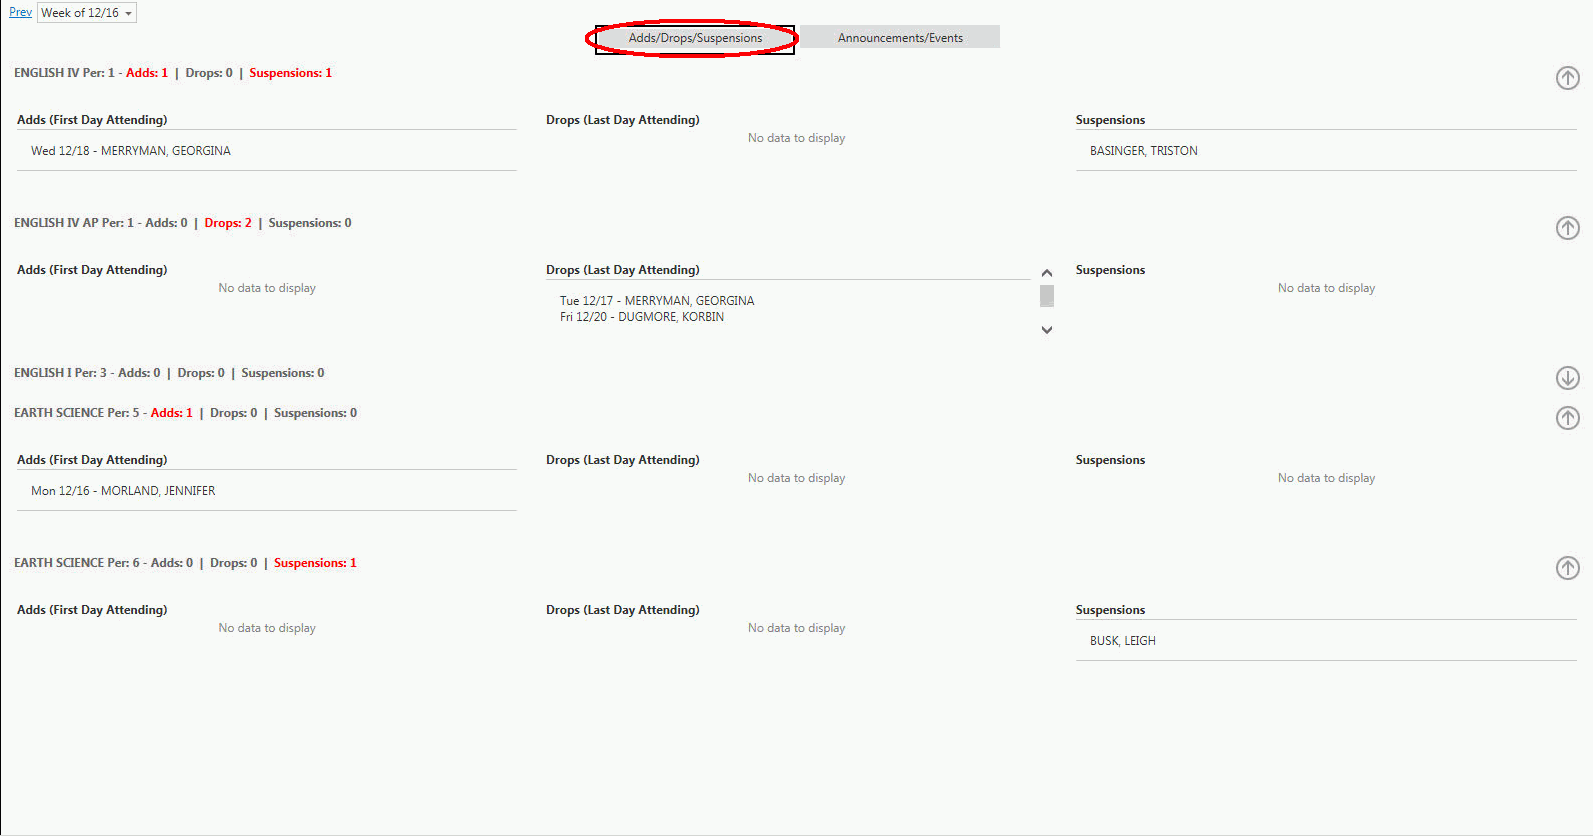
Notice the Adds/Drops/Suspensions Tab:

From this Tab, your adds, drops and suspensions are easily seen when on the Home Page.
This is a Drop Down List Box:

A Drop Down List Box displays as a box with a drop down arrow.
Whenever you click the down arrow, you will see a list that allows you to make a selection.
This is an Item Arrow:


Whenever you see an Item Arrow, simply click the down arrow to expand the item or click the up arrow to minimize.
Also notice the resources bar at the top of the Home Page.

These are quick links to access Documentation, Training Videos or MAS Announcements.
The Documentation Link opens the Help System (in a different window) for the Application in which you are working.
The Training Videos Link opens the Wengage Training Videos (in a different window) for the Application in which you are working.
The MAS Announcements Link informs you of important updates or enhancements made to the system.
Above the Resources Bar is the Account Management Link.

The Account Management Link allows you to use the Account Recovery Options (if applicable) and change your Password. For further instruction on Account Management, click here.
Many pages in the Application contain Tabs.

The Tabs display at the top of the page and allow you to move to a different screen while working in a certain area of the Application.
You will notice the Tab for which you are currently working is highlighted by a black box.
The Announcements/Events Tab displays announcements created by the Site or District for the week selected. The Calendar Events from the school calendar are created in i-SIS and will also display here.

The Navigation Bar displays on the left side of the screen no matter where you are working in the Application. This means that navigating through the program is quick and simple.

The Options Menu is located at the top of the Navigation Bar. The Options Menu takes you to every area within the Application.
The Quick Access Buttons are located at the bottom of the Navigation Bar. This makes accessing Attendance, Scores and Lesson Plans quick, using only one click of your mouse.
(Remember, the Navigation Bar remains on the screen no matter where you are working in the Application. So, the Quick Access Buttons can be accessed easily no matter where you are working.)
The Section Slider displays at the top of many of the pages. This allows you to move from Section to Section to complete a task without leaving the page.

The selected Section is highlighted by a black box.
The Period Slider displays at the top of the Attendance Page. This allows you to move from period to period to record Attendance without leaving the page.

The selected Period is highlighted by a black box.
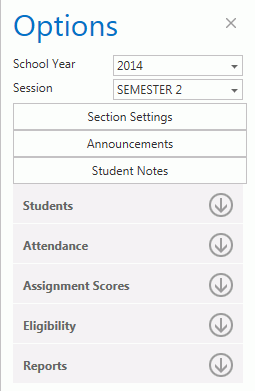
The Options Menu can be accessed from the Navigation Bar.

You can navigate to anywhere in the Application from the Options Menu. So, this is where you go to access areas of the Application not accessed using the Quick Access Buttons.
You can also select the School Year and Session for which you want to work. The Application defaults to the current School Year and Session. You will also notice this is where you access Section Settings, Announcements (entered by the Instructor) and Student Notes.