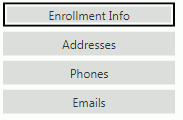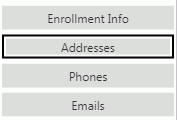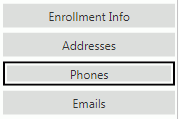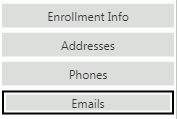
You will need to work your way through each Tab and verify/update the information as needed.
Select the Student Tab/Enrollment Info Tab. The selected tab is highlighted by a black box.

Verify the information in each field is correct for the Student.
If a field is blank or needs to be changed, input specifications are as follows:
Student UID: Enter the Student's user-defined identification code.
SSN: Enter the Student's Social Security Number. If you enter a Social Security Number for the Student, the SSN will be displayed masked with the * character wherever the SSN is displayed within the application. Therefore, it will display as *********. If you do NOT enter a SSN, the field will display as blank.
Note: The SSN will display this way ONLY if the user is NOT assigned rights to view the SSN in the Account Management Application.
State Pr ID: This ID is generated through the WAVE and cannot be manually entered.
First: Enter the Student's First Name.
Middle: Enter the Student's Middle Name.
Last: Enter the Student's Last Name.
Suffix: Enter the Student's Suffix, if applicable. (i.e., Jr., Sr.)
Alternate First: Enter the Student's alternate first name, if applicable.
Alternate Last: Enter the Student's alternate last name, if applicable.
Hispanic/Latino: Check the Check Box if the Student is of Hispanic/Latino descent.
Primary Race: Use the Drop Down List Box or type to enter the Student's Primary Race.
Races: Check the Check Box(es) if other races apply.
Gender: Use the Drop Down List Box or type to enter the Student's Gender.
Date Of Birth: Use the Drop Down Calendar Box or type to enter the Student's date of birth.
Date Of Birth Verification: Use the Drop Down Calendar Box or type to enter the type of verification used to verify the Student's date of birth.
Birth Place: Use the Drop Down List Box or type to enter the Student's Birth City.
State: Use the Drop Down List Box or type to enter the Student's Birth State.
Country: Use the Drop Down List Box or type to enter the Student's Birth Country.
Language: Use the Drop Down List Box or type to enter the Student's Primary Language.
Grade: Use the Drop Down List Box or type to enter the Student's Grade.
Entry Code: Use the Drop Down List Box or type to enter the Student's Entry Code.
Entry Date: Use the Drop Down Calendar Box or type to enter the Student's Entry Date.
Basis of Admission Code: Use the Drop Down List Box or type to enter the Student's Basis of Admission Code.
After
you have verified/updated the data, click  .
.
Select the Addresses Tab.

Only use the Addresses Tab to enter the Student's address, if applicable.
NOTE: If the student does not have Address Information entered into their Addresses Tab, but has an assigned Primary Contact already in the database OR you assign a Primary Contact using the Relationships Tab here in the Student Records Submissions, the system will use the Primary Contact's information to populate the fields.
NOTE: To assign a person to a student as the Primary Contact, you must have selected Parent Legal Guardian OR Has Custody AND Access to Records in the Relationships Grid.
Click  next to the Addresses
Grid if you need to add an address.
Select the address, and click  if you need to edit an address.
Select the address, and click  if you need to delete an
address.
Select the Phones Tab. 
Only use the Phones Tab to enter the Student's Phone Number(s), if applicable.
NOTE: If the student does not have Phone Information entered into their Phones Tab, but has an assigned Primary Contact already in the database OR you assign a Primary Contact using the Relationships Tab here in the Student Records Submissions, the system will use the Primary Contact's information to populate the fields.
NOTE: To assign a person to a student as the Primary Contact, you must have selected Parent Legal Guardian OR Has Custody AND Access to Records in the Relationships Grid.
Click  next to the Phones
Grid if you need to add a phone number.
Select the phone number, and click  if you need to edit a phone
number.
Select the phone number, and click  if you need to delete a
phone number.
Select the Emails Tab. 
Only use the Emails Tab to enter the Student's email address(es), if applicable.
NOTE: If the student does not have Email Information entered into their Emails Tab, but has an assigned Primary Contact already in the database OR you assign a Primary Contact using the Relationships Tab here in the Student Records Submissions, the system will use the Primary Contact's information to populate the fields.
NOTE: To assign a person to a student as the Primary Contact, you must have selected Parent Legal Guardian OR Has Custody AND Access to Records in the Relationships Grid.
Click  next to the Emails
Grid if you need to add a phone number.
Select the email, and click  if
you need to edit an email(s).
Select the email, and click  if
you need to delete an email(s).
Next, you will need to move to the Relationships Tab.
To view documentation on the Relationships Tab, click here.