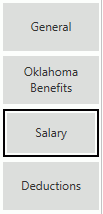
Click the Salary Tab on the left side of the screen.
After you create a Time Sheet for an Employee, the system will move all information that has been entered in the Permanent Tab/Salary Tab to the Time Sheet Tab/Salary Tab. You can change any of the Salary Line information or add another Salary Line.
Click  next to the Salary
Lines Grid.
next to the Salary
Lines Grid.
Input specifications are as follows:
Adjustment Code: Use the Drop Down List Box to enter the Adjustment Code.
Add-This will add the amount that is entered in the Adjustment Field to the Employee's Salary.
Ded-This will deduct the amount that is entered in the Adjustment Field from the Employee's Salary.
Unit-This will multiply the amount entered in the Adjustment Field times the Amount.
Non-Use Non if the amount you are going to enter is Non-Taxable. The Pay Type must be set to Set. The Amount must be set to 0. The Adjustment Field is the non-taxable Amount.
UnitDS-Use UnitDS if the Pay Type is set to Rate and you are entering a Deferred Salary for this Employee.
Adjustment: Enter the Adjustment Amount.
Pay Type: Use the Drop Down List Box to enter a Pay Type for this Employee.
CONT-Contract: The system will divide the Salary amount by the number of Pay Periods set based on the Begin and End Pay Periods.
S-Set: The system will use the Set Amount for the Salary and pay that Amount each time based on the Begin and End Pay Periods.
RATE-Rate: The system will use the Rate and multiply it times the Pay Unit.
RATETS-Rate Time Sheet: You must enter a Time Sheet (Time Sheet Tab) for the Employee if this Pay Type is Selected.
Amount: Enter the Amount according to the selected Pay Type.
Pay Unit: Enter the number of Pay Units, if applicable. If you entered Contract, Set or RATETS in the Pay Type Field, leave the Pay Unit Field set to 0. If you entered RATE in the Pay Field Type Field, the system will multiply the amount times the Pay Unit you enter here.
Begin Pay Period: Enter the Begin Pay Period for which this Employee will be paid.
Note: The Begin and End Pay Period format is dependent upon the Pay Type that was selected in the General Tab.
End Pay Period: Enter the End Pay Period for which this Employee will be paid.
Note: If an Employee's Schedule Type (General Tab) was set to Monthly, the system will not allow you to enter 13 months for the Begin and End Pay Period. The maximum amount of months is 12.
Project: Use the Drop Down List Box or type to enter the Project Code for this Employee. If you type to enter the Project Code, the system will tab to the next field.
Function: Use the Drop Down List Box or type to enter the Function Code for this Employee. If you type to enter the Function Code, the system will tab to the next field.
Object: Use the Drop Down List Box or type to enter the Object Code for this Employee. If you type to enter the Object Code, the system will tab to the next field.
Program: Use the Drop Down List Box or type to enter the Program Code for this Employee. If you type to enter the Program Code, the system will tab to the next field.
Subject: Use the Drop Down List Box or type to enter the Subject Code for this Employee. If you type to enter the Subject Code, the system will tab to the next field.
Job Class: Use the Drop Down List Box or type to enter the Job Class Code for this Employee. If you type to enter the Job Class Code, the system will tab to the next field.
Unit: Use the Drop Down List Box or type to enter the Unit Code for this Employee. If you type to enter the Unit Code, the system will tab to the next field.
Allocate: If this Employee's salary needs to be Allocated, check the Allocate Check Box. For further information on How to Add an Allocation, click here.
Max Amount: Enter a Maximum Amount for this Employee's Salary, if applicable.
The system will apply the Maximum Amount in this order: Salary Line, Fringes (according to the entered Display Order), Social Security Burden, Medicare Burden, Teacher Retirement Burden, Teacher Retirement Credit Salary. If there comes a point when the Employee's paid Salary is close to the Maximum Amount, the system will divide the Salary into 2 lines in order to figure the benefits. After Payroll is processed, the system will reduce the Maximum Amount displayed here to reflect what is remaining of the Maximum Amount.
Max Next Project: Use the Drop Down List Box or type to enter the Project Code that is to be used if the Employee's paid Salary reaches the Max Amount.
Display Order: If there is more than one Salary Line, you may enter a Display Order. The system will not accept duplicate Display Orders.
TR Fringe: Use the Drop Down List Box to enter the TR Fringe.
Fringes Grid:
To enter a Fringe:
Click
 to enter a Fringe Benefit for this Employee.
Fringe Code: Use the Drop Down List Box to enter the Fringe Code.
Display Order: Enter the Display Order for the Fringe.
You may enter as many as necessary.
Click  to save the Salary Line and add another.
Click
 to save the Salary Line.
NOTE: If In-Line Edit
Checks are enabled, and an Edit Check rule is broken, the
rule message will be displayed. If you want to ignore the rule and continue,
check the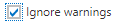 Check Box and click
  .
.
Now, you can enter Deductions, if necessary. To view Documentation on the Deductions Tab, click here.